Worklog table and actions
Browse/View permission
In some cases, you don't have the permission to view all of your worklogs on a given day. The cause of this can be changed permission. Please contact your administrator to resolve this if you experience missing work logs.
Modification permission
If you don't have the required permission to edit or delete work logs the "You are not allowed to perform this action on each Issue" message will appear.
In the worklog table, the worklogs belonging to the given day can be viewed. A row belongs to each worklog. The worklogs are ordered by the start date.
Columns
You can select and display additional columns to see the information on your logged work. The available columns are the following:
- Issue Type - The icon that displays the Issue type.
- Issue key - Issue key to which the worklog belongs. If the pointer hovered above the Issue Summary will appear.
 By clicking on it, the issue can be viewed. If it is closed, the Issue code gets strikethrough.
 - Issue summary - Issue Summary to which the worklog belongs. If the pointer hovered above the Issue key will appear. By clicking on it, the issue can be viewed. If it is closed, the Issue code gets strikethrough.
- Remaining - Remaining time on the issue in JIRA format. If Issue is not closed and if there is no more estimated time assigned to it, the remaining time becomes red. If the Issue is closed, the remaining time becomes grey.
- Start - Start date of the worklog.
- End - End date of the worklog.
- Duration - Duration of the worklog; the time between the start and the end date.
- Worklog Attributes - Attributes that have been added to the worklog.
- Description - Description of the worklog.
- Actions: The actions can be performed on the worklog. (not optional)
Actions
Edit
After pressing it, the given worklog can be edited. The worklog data will be displayed in the input field where they can be modified.
- The changes can be saved by pressing the Save button.
- Editing can be canceled by pressing the Cancel button.
Delete
A pop-up dialog window will be displayed, where the user can confirm whether he/she is sure to delete the worklog. After confirming it, the worklog will be deleted.
Copy
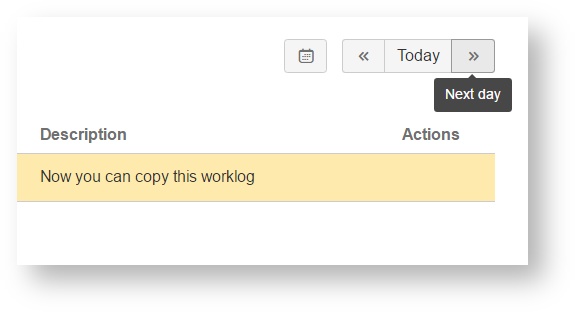
After pressing it, the given worklogs Issue and Note field will be copied to the Input fields and the worklog data will be displayed with a yellow background.
![]() You can now navigate to another day and copy the worklog data by clicking on the Save button.
You can now navigate to another day and copy the worklog data by clicking on the Save button.
Move All
The Move all button can be found below the worklog table, and it can be used to move all the worklogs to another day.
- Click on the "Move All" button.
- Select the desired date in the datepicker (day step button or calendar).
- After selecting the desired date, save the worklog relocation by clicking the Save button.
- The moving procedure can be cancelled by pressing the Cancel button.
![]() In this case, only the date of the worklogs can be changed.
In this case, only the date of the worklogs can be changed.