| Note |
|---|
Only JIRA Administrators, JIRA System Administrators can configure Timetracker. |
| Info |
|---|
On these pages, you can configure the behavior of the Timetracker. To open the Timetracker Global Settings:
|

| Panel | ||||||||
|---|---|---|---|---|---|---|---|---|
| ||||||||
|
Logging Time
Logging Time
Mandatory Work Description
Adminstrators can choose whether worklog description is mandatory or not for Timetracker users. By default, description is optional.
Maximum hours per day per user
Here you can define the maximum loggable hours per day for Timetracker users. Empty field means there is no limit.
Eg.: 6, 8 or 6.5
Logging time to the future
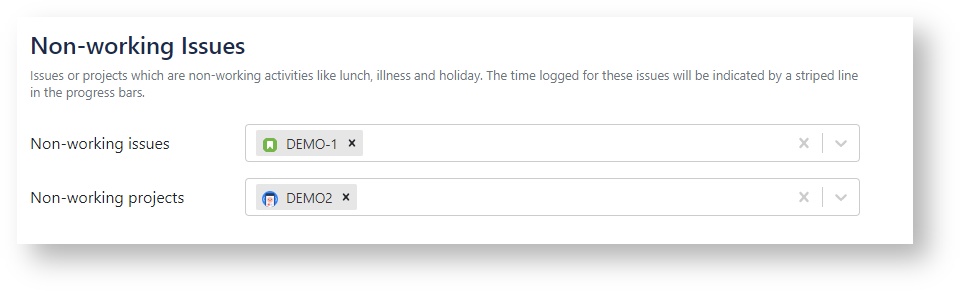
Non-working Issues
This feature is designed to manage non-working, non-billable projects and/or issues. This feature can be useful if you have a dedicated project or issues for non-work activities, eg. for lunch.
![]() The time logged for these Issues will be indicated by a striped line in the progress bars of the Timetracker screen.
The time logged for these Issues will be indicated by a striped line in the progress bars of the Timetracker screen.
Working days
You can manage special dates here, like public national holidays, or weekends, which are working days. These dates will affect the calculation of expected working hours, calendar coloring, and some time tracking functionalities. By default, all weekdays are working days while all weekends are non-working days.
Timetracker's many features behavior depends on whether the given day is a working day or not:
- Calendar Appearance
- Default date setting
- Progress bars on Timetracker
- Period worklog
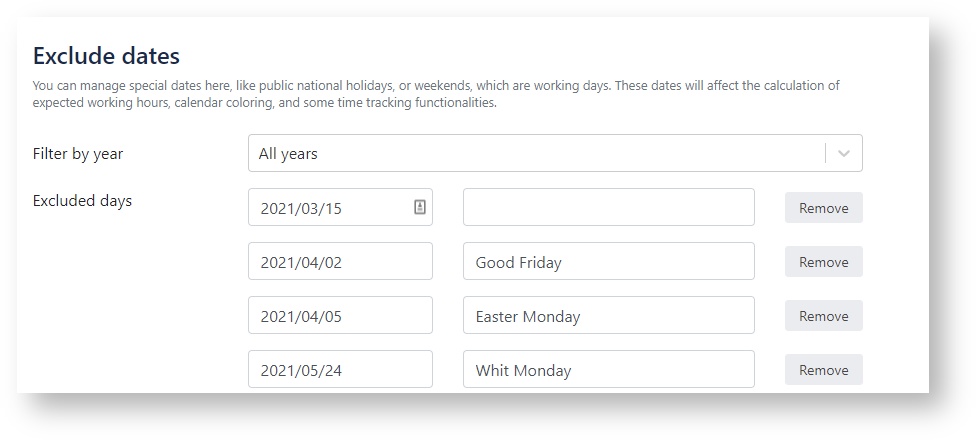
Exclude date
You can manage special dates here, like public national holidays that are weekdays but not working-days:
- You can add days that are by clicking on the Date field and select the date in the calendar.
- You can add a description for the selected date. (optional)
- You can remove a date from the list by clicking on the Remove button.
Filter dates
Existing dates can be filtered by years. Provide a year number in the "Filter by year" field to filter the special days down to that year.
Include date
You can manage the included days the same way as the excluded days.
Permissions
| Permission | Description | Default (without groups or users have been added) |
|---|---|---|
| Permission to use Timetracker | Only users with this permission can:
| All users can view and use Timetracker's work logging functionality by default. You can narrow this down by adding Jira users or groups here, in which case only these users will have the permission. |
| Permission to use Reporting | Only users with this permission can:
| All users can view and use Timetracker’s reporting functionality by default. You can narrow this down by adding Jira users or groups here, in which case only these users will have the permission. |
| Permission to browse others report other users' worklogs | Only users with this permission can:
| Any user can report any other user’s worklogs by default. You can narrow this down by adding Jira users or groups here, in which case only these users will have the permission, while every other user will only see their own worklogs. |
Only users with this permission can:
| None of the users have permission to manage global and project-specific billing settings by default. Add Jira users or groups here who will have permission to manage billing. The billable/non-billable options will remain visible and selectable to all users when logging work. | |
Only users with this permission can:
| By default none of the users have permission to create, edit, archive or delete worklog tags. If you want to enable this option, provide users or groups who can manage the tags here. The tags remain visible and selectable to all users when logging work. | |
| Permission to create worklogs to the past/future without restrictions | Only users with this permission can:
| The configured day limit within which users can log work is enforced on every user by default. Here you can add users or groups who will still be able to create and edit worklogs beyond the configured days. |
To configure a permission:
- Click on the permission's input field.
- Start typing the required JIRA user or group name.
- Select the user or group from the appearing list.